DOTAScenePanel
In this tutorial we'll go through the tricks you can do with the undocumented DOTAScenePanel class in panorama.
Now, you might have seen its usage if you looked through the sources in the main menu. This panel allows us to display 3D content in panorama. You might have tried using it yourself. It's pretty easy to setup a simple panel to display a unit, with code like
<DOTAScenePanel style="width:400px;height:400px;" unit="npc_dota_hero_sven" particleonly="false"/>
Please note particleonly='false' is required for DOTAScenePanel to display anything other than particles properly.
Code like this is used to display heroes in the armory. This panel also has no custom dynamic properties, meaning that we can't change the unit after creating a panel.
In armory, heroes models can be rotated, and this behaviour can be enabled with allowrotation="true" set. However, this parameter is not compatible with custom background maps.
Background maps
But wait, there's more! DOTAScenePanel accepts the "map" parameter, which points to a specific type of vmaps - background maps. You can find them in asset browser in background folder. Those vmaps only accept a specific set of entities and are shown in panorama using cameras. Let's follow up by creating a simple background map.
Setting up the map
Start up hammer editor and create a new map. Save it in your maps folder as background.vmap. Go to Map -> Map Properties (Ctrl-Shift-P) and check the 'Compile as background map' checkbox.
Use the Entity Tool (Shift-E) and choose the prop_dynamic entity, then click somewhere in the world to place it.
Select that newly placed entity in the outliner and change its World Model property to models/courier/donkey_unicorn/donkey_unicorn.vmdl.
Now you've got your movie star ready to be displayed. You can also change the Default Animation field to idle or any string from its model entries.
Now we've got action, but still missing lights and camera. Let's begin with light - with the Entity Tool (Shift-E), create a env_global_light entity. Change its name to light, for example.
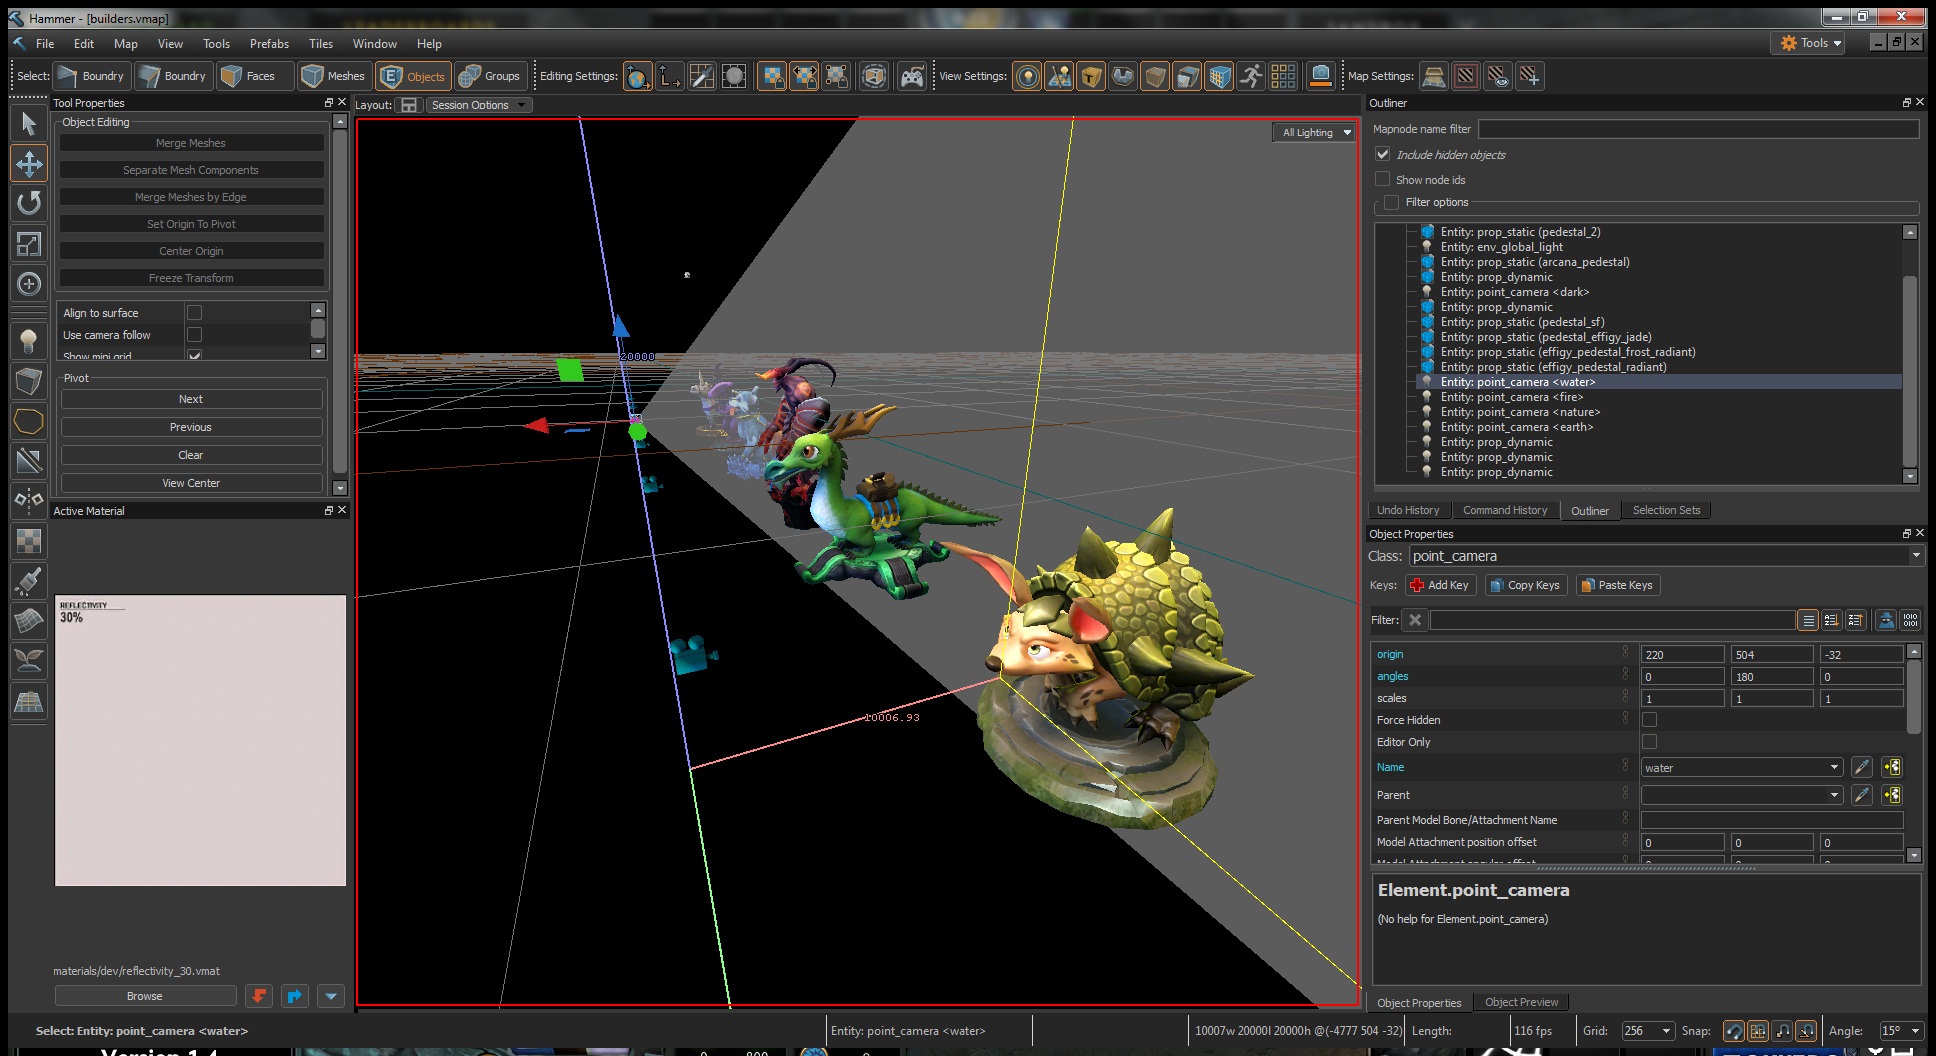
Same as env_global_light, create a point_camera entity. Select your newly created camera, move your hammer camera in such way that you can see the donkey and click View - Align Selection to Active Camera.
As the last step select your camera and give it a name in the properties, like camera1.
Save your map and build it (F9).
Setting up panorama
I won't describe how to set up a basic panorama environment, if you are having issues with displaying simple panels, refer to https://developer.valvesoftware.com/wiki/Dota_2_Workshop_Tools/Panorama Once you've ready to go, simply add <DOTAScenePanel style="width:400px;height:400px;" map="background" light="light" camera="camera1" particleonly="false"/> to your XML, you should see your donkey movie star in its full glory. Shouldn't take you more than 10 minutes.
Now let's get to the advanced part.
The part where magic gets real
Units with cosmetics
We can easily build up a "unit" like scene, using the portrait_world_unit entity type. This entity supports all kinds of units and also cosmetic item definitions. The quirk here is that you have to enter the raw properties editing mode to set displayed entity to a hero. Item definitions property all refer to different loadout slots and accept item IDs. Item ID list can be found here.

Multiple cameras
This is pretty straightforward, DOTAScenePanel also accepts the camera parameter in the definition, which will try to find the camera with the provided name.
Important to note, compiling the map again does change the look of the panorama panel without restarting the map, but you can't change it at runtime. You'll understand how to achieve the same result in the following parts.
Dynamic layout loading
Since the only thing DOTAScenePanel respects is its own layout definition, we will have to provide it from the start. Fortunately we can load layout from string, while altering the definition.
var camera = "camera1";
var style = "width:400px;height:400px;";
if (someCondition) {
    camera = "camera2";
}

var sceneContainer = $("#SomeContainer");
sceneContainer.BCreateChildren("<DOTAScenePanel style='" + style + "' map='background' particleonly='false' light='light' camera='" + camera + "'"/>");As you might have noticed, you have to wrap the whole thing in '', while also providing the initial container for the layout. Pretty terrible, but for now it seems like the only way.
Firing IO events
Animation
Now the REAL fun starts. Dashboard source code uses the DOTAGlobalSceneFireEntityInput event which starts the particles on the home button, for example. This event is basically a DoEntFire specifically for DOTAScenePanel.
For example usage, set up a simple <DOTAScenePanel id="scene" style="width:400px;height:400px;" map="background"/> (notice the id, it's very important!) once again. But this time, alter the map and change the donkey Name property to donkey, don't forget to rebuild the map.
Now make a basic panorama button, and give it onactivate="DOTAGlobalSceneFireEntityInput(scene, donkey, SetAnimation, death)".
Now if you've done everything correctly, your donkey should play his death animation every time you press the button. How? Magic. But really though, refer to the Inputs part of this page. Notice the SetAnimation input.
Also notice how we've used DOTAGlobalSceneFireEntityInput in onactivate as if it were a real function, which it isn't. That's because panel events are special cornflakes. In panorama javascript you have to use $.DispatchEvent("DOTAGlobalSceneFireEntityInput", arguments) to achieve the same result.
Example
$.DispatchEvent(
  'DOTAGlobalSceneFireEntityInput',
  'LightBuilder',
  'donkey',
  'SetAnimation',
  'spawn',
);Scripts? Scripts!
If you were a good boy, you might have noticed the RunScriptFile and RunScriptCode inputs.
Now make a donkey.lua file in your vscripts folder and put a simple print("Onions have layers, donkey") in it.
Now set your button onactivate to DOTAGlobalSceneFireEntityInput(scene, donkey, RunScriptFile, donkey).
Notice the lack of file extension. Press the button again. You should see the message in the console. Congratulations!
But don't get too excited. Yes, you can execute lua from panorama. But it's clientside-lua and it's very limited. You can't even move things there. The only good thing I could think to do is particles. A recent patch added ParticleManager support to clientside lua. So theoretically you can create, destroy and move different particles there, and particles are very powerful.
Entity parenting
The way cosmetics in dota works is that every cosmetic item is a separate entity which is parented to a hero, attached to a specific attach point with specific offsets and offset angles. And we can do that too! (Well, partly, at least)
The way that works is you select a prop_dynamic, in object properties put up a parent entity name, put in the Parent Model Bone/Attachment Name (you can look up attachment names in the model editor), check the Use Model Attachment Offset checkbox and then realize that changing attachment offset doesn't work. At least for now. Changing angles works though so there is hope that offset will be fixed someday.
That's it!