Tooltip Generator
Recently, the development of a new project that named the Tooltip Generator has been completed. This project was inspired by Ark's Eaglesong idea whose purpose was to make adding localization as easy as possible, while reducing the chance to make mistakes. This project includes a secondary part, completely optional, named the Tooltip Codemaker, which helps those that already have a working addon with a lot of localization.
The Tooltip Generator
The tooltip generator creates predefined Typescript objects which fit into one of three categories: Standard Tooltips, Abilities, and Modifiers. The advantage to that is the ability to write a very easy to read object by code based on the group of tooltips you're making. Whenever you make a change to any of the files and save, the Tooltip Generator will immediately take the code you've created and make localization files (such as addon_english.txt) that the game can read. This can be expanded further to support an infinite array of languages as well using the same code with slight changes to the fields you want to change.
Wait, Typescript? My setup is lua!
This project is designed to work on both lua and Typescript based addons. While you will have to use Typescript specifically to make the localization, the rest of your addon is completely unaffected by this.
INFO
Most editors have plugins that add Typescript support. VSCode has built-in Typescript support and requires no plugins. In order to view Typescript syntax, make sure that your editor has Typescript support installed or enabled.
Why would I ever bother using that though?
There are a few reasons why I've started this project in the first place. I was getting frustrated by the "rules" of the KV, such as having to copy "DOTA_Tooltip_Ability_my_ability_name" over and over. I constantly mistyped "Description", and occasionally used only 2 percentages instead of 3 on "%something%%%" to show a variable with a percentage. And if I ever had a missing quote, the entire thing got broken, which is extremely annoying.
In addition, as I've developed my game, my addon file became HUGE. Because of the way Dota reads this file, you cannot use #base to split this into files, and some people have resorted to making a manual script that does that. It's a lot of hassle and wasted time for everyone involved.
This project attempts to solve all those problems:
- It makes sure you never do any formatting mistake.
- You only make a single object per ability or modifier and fill all the details for it.
- You can use predefined enums to call modifier properties correctly.
- You can split it to as many files as you want.
- You can easily use your own variables to use keywords that repeat.
- All languages are managed in a single location and are properly distributed to the appropriate files.
I encourage you to at least give this project a try. You won't be disappointed.
What do I need in order to use it?
This project uses Typescript and npm packages to function. Both of those require NodeJS. If you don't have it installed, or have a really old version, download the latest stable version from NodeJS site and install it.
The Tooltip Codemaker
When I was developing the tooltip Generator, I manually did every single localization I had to code, and when I was done, I thought to myself: why didn't I just do a script that does it for me?
This gave birth to the Tooltip Codemaker. The Tooltip Codemaker is the exact opposite of the Tooltip Generator: instead of turning code into localization KVs, it turns localization KVs into code! This is particularly useful if you already have a lot of localization done by KV.
Most of the time, you'll only use this tool no more than once, to turn your current KV into code. After that, the assumption is that you'll continue creating the rest of the tooltips using the Tooltip Generator. If your addon is completely empty, you don't need it at all.
Note that the Codemaker isn't, and cannot be perfect, due to the nature of how localization KVs are defined. It looks for keywords like _Description, _Lore, _Note etc. to pinpoint the actual ability name, then groups all similar KVs to that ability. Abilities that have very similar naming scheme can be mistakenly grouped together; for example, in vanilla Dota, the ice_blast and ice_blast_release abilities were grouped as one, since it thought _release was one of the ability specials of ice_blast. Just make sure to take a look at the code after running the script and fix the mistakes manually, if any.
The script assumes that everything that begins with Dota_Tooltip_Ability_... is an ability, and everything that begins with Dota_Tooltip_modifier_... is a modifier (case insensitive). Everything else is regarded as a Standard Tooltip. That means that depending on your KVs, you might have to make changes to the compiler before running it in order to have it work on your addon's localization files.
You can find the Tooltip Codemaker in this github repo. Follow the readme for instructions on how to use it.
Installing the Tooltip Generator
In order to use the Tooltip Generator, you must install it. This only needs to be done once per project. Navigate to the game's root of your addon. For most projects, that would be in dota 2 beta/game/dota_addons/your_addon/. If you're using symlinks or a Typescript configuration, the symlinked folder is most likely to be the root of your folder.
Click on the path bar of the folder, type cmd and press enter. This should open the command line on the folder you're currently in. If you're not sure where the path bar is, press Alt+D to highlight it.
In the command line, type npm install @shushishtok/tooltip_generator. The installation should take a few seconds, which triggers an additional, "final" installation, which can take up to a few minutes. When the installation completes, it should show a success message and a few warnings - you can ignore those warnings. Keep the command line open for now.
After the installation is completed, a new file package.json is added to your addon's root, along with a node_modules folder. You can mostly ignore those files completely.
The installation assumes that your resource folder is located on your root, which should be the case for standard addons created by the Dota Workshop. If so, skip ahead. However, if this is not the case, open package.json and change "~resource": "resource", field to match the path from the root folder to that folder. For example, Typescript configurations using Moddota's Typescript Template will need to change it to "~resource": "game/resource",. Save the file and close it.
On the command line, type npm run init and press enter. This added a few files to your resource folder, which you can also ignore. You'll also see a new folder, localization, which is the core of all your Typescript-coded localization files.
DANGER
The next step activates the Tooltip Generator, which will completely erase all of your addon localization files (such as addon_english.txt) and replace them with your code. Make sure to back them up before proceeding!
Testing the Tooltip Generator
Navigate to the localization folder inside your resource folder. In this folder you will find localizationData.ts. This is used as a sample for the tooltip generator. Open it to find the following code:
StandardTooltips.push({
  classname: 'Hello',
  name: 'test',
});This object is a Standard Tooltip, which is expected to be converted to "Hello" "test" in the KV. Let's test it to check if it works as expected.
Using the same command line as before, run npm run dev. If it works as expected, you should see it is watching a few files, and that it wrote a few localizations: 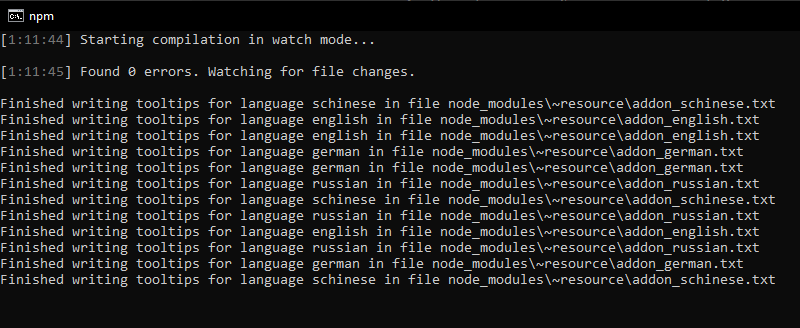
Check the addon_english.txt file. It should now have only one localization, as we only have the single test object.
INFO
While the command line is running the npm run dev command, a "watcher" process is running and is waiting for changes. Any changes done in files in the localization folder will immediately re-compile the files and re-create the addon_<language> files.
You might notice that there are other language files as well. By default, the English, Russian and Standard Chinese (SChinese) are enabled. Later in this guide, we'll discuss language control for those files. Right now, all files have exactly the same output, so you can ignore them for now.
Just to make sure that the watcher is working correctly, go back to localizationData.ts and make a new Standard Tooltip object as follows:
StandardTooltips.push({
  classname: 'watcher_test',
  name: 'This should be automatically added',
});Save your file. Your command line have refreshed (don't worry if you missed it). Check your addon_english.txt (you might have to close it and open it again to see changes). If you can now also see a second localization "watcher_test" "This should be automatically added", the test is successful.
INFO
You can activate the watcher in any editor that supports npm builds, like VSCode, by running the npm run dev in it. Sublime also has this support, but requires a short setup which you can find in the readme of the Tooltip Generator Github repo. Regardless, you can always use the command line to do so. The downside to it is needing to have the command line window open while the watcher is running, which isn't as fun.
Localization Types
In the base form of the localization generator, each localization goes into one of three categories:
Standard Tooltips: Everything that isn't an ability or a modifier. Has no predefined key structure, and can be everything. The above examples are Standard Tooltips. Those are the most simple types of KVs.
Ability Tooltips: All abilities adhere to the key structure of
DOTA_Tooltip_ability_abilityname. They also have predefined suffix keys such as_Description,_Lore,_Note0etc. A single ability tooltip object can include many properties, as mentioned above, and supports all ability suffix keys.Modifier Tooltips: All modifiers adhere to the key structure of
DOTA_Tooltip_modifiername. It is common to start every modifier's name withmodifier_..., but those should work here even if you named your modifiers differently.
In my personal mod, Dota Reimagined, I've created two more Tooltip Localization types: Reimagined Tooltips and Talent Tooltips. Those are disabled (commented out) in the compiler because they do not work on standard modes (even talents, that system is custom made in my mod). However, they can be used as good reference to setting up additional localization types if you so desire. Feel free to check the compiler (found at node_modules/@shushishtok/tooltip_generator/localizationCompiler.ts) and tweak it as you see fit. The above Tooltips types should be sufficient for most modes.
Standard Tooltip Example
Standard Tooltips are extremely straightforward and are very easy to make. They have the following fields:
- Classname: string
- Name: string
Classname is the left side of the KV and Name is on the right. For instance, the following tooltip object:
StandardTooltips.push({
  classname: 'standard_tooltip_example',
  name: 'Tooltip Example',
});Will produce the following KV:
"standard_tooltip_example" "Tooltip Example"As you can see, it produces exactly the class-name relationship of an object, with no other logic applied.
Ability Localization Example
Ability Tooltips probably have the biggest objects, because abilities can include a lot of properties. Each property has an expected type (explained later). Ability Tooltips have the following fields:
- Ability Classname: string
- Name: string
- Description: string
- Lore: string
- Notes: Array of strings
- Scepter description: string
- Shard description: string
- Ability specials: Array of Ability special objects.
You may notice that notes and ability specials are arrays. This is because an ability can (technically) have an indefinite amount of notes and ability specials, those are defined here. Let's begin with a simple ability example:
Abilities.push({
  ability_classname: 'aghanims_shard_explosion',
  name: 'Shard Explosion',
  description: 'Fires a shard at the target point which deals damage on impact.',
  lore: "Aghanims' signature move, firing shards of arcane energy.",
});This is straightforward, and will create the following ability KV:
"DOTA_Tooltip_Ability_aghanims_shard_explosion"    "Shard Explosion"
"DOTA_Tooltip_Ability_aghanims_shard_explosion_description"    "Fires a shard at the target point which deals damage on impact."
"DOTA_Tooltip_Ability_aghanims_shard_explosion_Lore" "Aghanims' signature move, firing shards of arcane energy."Pretty nifty, right? Let's add scepter and shards effects to the ability:
Abilities.push({
  ability_classname: 'aghanims_shard_explosion',
  name: 'Shard Explosion',
  description: 'Fires a shard at the target point which deals damage to all enemies on impact.',
  lore: "Aghanims' signature move, firing shards of arcane energy.",
  scepter_description: 'Increases damage and explosion range.',
  shard_description: 'Decreases cooldown of the ability.',
});After saving, those are immediately added to the localization:
"DOTA_Tooltip_Ability_aghanims_shard_explosion"    "Shard Explosion"
"DOTA_Tooltip_Ability_aghanims_shard_explosion_description"    "Fires a shard at the target point which deals damage to all enemies on impact."
"DOTA_Tooltip_Ability_aghanims_shard_explosion_Lore"    "Aghanims' signature move, firing shards of arcane energy."
"DOTA_Tooltip_Ability_aghanims_shard_explosion_scepter_description"    "Increases damage and explosion range."
"DOTA_Tooltip_Ability_aghanims_shard_explosion_shard_description" "Decreases cooldown of the ability."You may have noticed that I didn't use any number or ability special variable on the ability, so let's discuss that. Most ability fields supports using variables to be replaced as numbers in the game based on the value of an ability special. In KV, it is usually done by the format of %something%, where something reflecting an ability special value. The use of percentages as a delimiter always seemed flawed to me. Instead we use the {something} delimiter. Variables defined this way will be correctly processed to the format expected by KV. An advantage of that is the addition to percentages: if you wanted to show 20% in game, where 20 is your ability special, all you have to do is {something}%. Let's make an example of that in our ability:
Abilities.push({
  ability_classname: 'aghanims_shard_explosion',
  name: 'Shard Explosion',
  description:
    'Fires a shard at the target point which deals {damage} damage to all enemies on impact.',
  lore: "Aghanims' signature move, firing shards of arcane energy.",
  scepter_description:
    'Increases damage by {scepter_damage} and explosion range by {scepter_aoe_bonus}.',
  shard_description: 'Decreases cooldown of the ability by {shard_cd_pct}%.',
});This translates into proper KV:
"DOTA_Tooltip_Ability_aghanims_shard_explosion"    "Shard Explosion"
"DOTA_Tooltip_Ability_aghanims_shard_explosion_description"    "Fires a shard at the target point which deals %damage% damage to all enemies on impact."
"DOTA_Tooltip_Ability_aghanims_shard_explosion_Lore"    "Aghanims' signature move, firing shards of arcane energy."
"DOTA_Tooltip_Ability_aghanims_shard_explosion_scepter_description"    "Increases damage by %scepter_damage% and explosion range by %scepter_aoe_bonus%."
"DOTA_Tooltip_Ability_aghanims_shard_explosion_shard_description" "Decreases cooldown of the ability by %shard_cd_pct%%%."Finally, let's talk about notes and ability specials. Notes are arrays of strings, with each string reflecting a note about the ability. The compiler will properly compile them into Note0, Note1, Note2 etc. that the game expects.
Ability specials are slightly more complex. Those are arrays of ability special objects. Each object expects, at the very least, the ability special name and its ingame text, like "shard_damage" and "DAMAGE". It expects nothing else except the text. However, it supports two optional fields:
- Percentage
- Item stat
Those are both booleans that default to false if omitted, and would only be included if you want to specifically enable them. The percentage field adds a % to the beginning of the text, while the item stat adds +$ instead. Let's make our complete ability tooltip by integrating those into our example above:
Abilities.push({
  ability_classname: 'aghanims_shard_explosion',
  name: 'Shard Explosion',
  description:
    'Fires a shard at the target point which deals {damage} damage to all enemies on impact.',
  lore: "Aghanims' signature move, firing shards of arcane energy.",
  scepter_description:
    'Increases damage by {scepter_damage} and explosion range by {scepter_aoe_bonus}.',
  shard_description: 'Decreases cooldown of the ability by {shard_cd_pct}%.',
  notes: [
    'The projectile moves at {projectile_speed} speed.',
    'Despite the visual effect, all enemies in range immediately take damage upon impact.',
    'Can be disjointed.',
  ],

  ability_specials: [
    {
      ability_special: 'damage',
      text: 'DAMAGE',
    },

    {
      ability_special: 'radius',
      text: 'EXPLOSION RADIUS',
    },

    {
      ability_special: 'scepter_cd_reduction',
      text: 'COOLDOWN REDUCTION',
      percentage: true,
    },
  ],
});The Ability Tooltip object looks bigger because of the spaces between each ability special object, but honestly that's my own coding preference - as long as you adhere to the structure of objects inside an array, it would still process the information just as well.
This is processed to the final KV that the game reads perfectly:
"DOTA_Tooltip_Ability_aghanims_shard_explosion"    "Shard Explosion"
"DOTA_Tooltip_Ability_aghanims_shard_explosion_description"    "Fires a shard at the target point which deals %damage% damage to all enemies on impact."
"DOTA_Tooltip_Ability_aghanims_shard_explosion_Lore"    "Aghanims' signature move, firing shards of arcane energy."
"DOTA_Tooltip_Ability_aghanims_shard_explosion_Note0"    "The projectile moves at %projectile_speed% speed."
"DOTA_Tooltip_Ability_aghanims_shard_explosion_Note1"    "Despite the visual effect, all enemies in range immediately take damage upon impact."
"DOTA_Tooltip_Ability_aghanims_shard_explosion_Note2"    "Can be disjointed."
"DOTA_Tooltip_Ability_aghanims_shard_explosion_scepter_description"    "Increases damage by %scepter_damage% and explosion range by %scepter_aoe_bonus%."
"DOTA_Tooltip_Ability_aghanims_shard_explosion_shard_description"    "Decreases cooldown of the ability by %shard_cd_pct%%%."
"DOTA_Tooltip_Ability_aghanims_shard_explosion_damage"    "DAMAGE"
"DOTA_Tooltip_Ability_aghanims_shard_explosion_radius"    "EXPLOSION RADIUS"
"DOTA_Tooltip_Ability_aghanims_shard_explosion_scepter_cd_reduction" "%COOLDOWN REDUCTION"Modifier Localization Example
The last group is a Modifier Tooltip. Unlike abilities, modifiers only have a classname, a name and a description. However, they also have an element of their own: they can present dynamic values by using modifier properties. I've always incorrectly used them, so I've taken an extra step to fix this. For now, let's make a simple modifier:
Modifiers.push({
  modifier_classname: 'modifier_greater_power',
  name: 'Greater Power',
  description: 'Increases your base damage and your move speed.',
});It is very quickly processed to the following KV:
"DOTA_Tooltip_modifier_greater_power"    "Greater Power"
"DOTA_Tooltip_modifier_greater_power_description" "Increases your base damage and your move speed."This time, we want to also include the exact bonus to the base damage and the move speed bonus that you get from this modifier. Assuming you increase your base damage by using the MODIFIER_PROPERTY_PREATTACK_BONUS_DAMAGE modifier property, we can use an enum to use it. Note that in order to be able to insert variables into strings, we need to use string interpolation, which is done by encasing the string with with backticks (see example if this isn't clear). In addition, we must adhere to the following structure: {${LocalizationModifierProperty.SOME_PROPERTY}}. When using string interpolation, ${variable} convert during compilation to the actual variable's value. This allows us to use enums for those modifier properties.
INFO
When calling enums, you only need to specify the property's name, not the entire string. For instance, MODIFIER_PROPERTY_PREATTACK_BONUS_DAMAGE will be called by simply typing PREATTACK_BONUS_DAMAGE. This will still be correctly processed by the compiler to the form the game expects.
Let's improve the above example with dynamic variables. The move speed bonus is a percentage bonus, so we'll also add a % sign to it.
Modifiers.push({
  modifier_classname: 'modifier_greater_power',
  name: 'Greater Power',
  description: `Increases your base damage by {${LocalizationModifierProperty.PREATTACK_BONUS_DAMAGE}} and your move speed by {${LocalizationModifierProperty.MOVESPEED_BONUS_PERCENTAGE}}%.`,
});Those values are enums, so the compiler makes sure those are typed correctly, and assuming they're surrounded by {}, they should be properly processed. This is processed into KV like this:
"DOTA_Tooltip_modifier_greater_power"    "Greater Power"
"DOTA_Tooltip_modifier_greater_power_description" "Increases your base damage by %dMODIFIER_PROPERTY_PREATTACK_BONUS_DAMAGE% and your move speed by %dMODIFIER_PROPERTY_MOVESPEED_BONUS_PERCENTAGE%%%."This works for all modifier properties.
INFO
The property assumes the d (integer) prefix. If you want to use f (float) prefix instead, you can call it with {f${LocalizationModifierProperty.PREATTACK_BONUS_DAMAGE}}. Right now, f is the only additional supported keyword.
Language Control
Every tooltip can have different values based on the client's language, which is why we have many addon_<language>.txt files, one for each language. Different mods have different language supports, based on the primary language of the mode and additional translations. This has introduced the need for language control.
On the top of the .TS file, you can see an import for Language. This enum controls which languages are enabled; each enabled language will produce its addon_<language>.txt file. By default, the English, Russian and Standard Chinese languages are enabled. In addition, the None "language" is also enabled - it is only used for compilation, and should not be disabled or used.
In order to enable or disable a language, navigate to /game/resource/languages.ts. Inside it, you should see export enum Language, which has a list of languages. Simply comment or uncomment a language to disable or enable it. This needs to be compiled and refreshed for the changes to take effects, so restart your terminal with npm run dev and you should see the added/removed languages in the output.
Language Override Example
By default, all language files will have the same KVs. You can, however, override a specific language's field to make the compiler use a different string for that language. This is done by the language_override property which is available to all tooltip objects. Let's make an example utilizing the language override:
StandardTooltips.push({
  classname: 'standard_tooltip_example',
  name: 'Tooltip Example',
  language_overrides: [
    {
      language: Language.Russian,
      name_override: 'Пример всплывающей подсказки',
    },
  ],
});As the example shows, we're overriding the name field of the standard_tooltip_example classname with a different text. This is done specifically for the Russian language using a language override object for the Standard Tooltip. Additional objects can be added for every language that we want to have a different text for. This results in the following KVs:
"standard_tooltip_example" "Tooltip Example""standard_tooltip_example" "Пример всплывающей подсказки""standard_tooltip_example" "Tooltip Example"If you checked the Standard Chinese KV, you probably saw that it retains its English language. Because it was not overridden, it still used the "main" value provided by the name property of the Standard Tooltip object.
Splitting Files and Folders
One of the biggest annoyances with the localization files is the inability to split them to different files without using a script. The tooltip generator allows you to split your tooltips to as many files and folders as you need, as long as those files and folders are created inside the resource/localization directory.
For a tooltip file to also properly be watched and processed, it must have the following code:
import {
  AbilityLocalization,
  Language,
  LocalizationData,
  ModifierLocalization,
  StandardLocalization,
} from '~generator/localizationInterfaces';

export function GenerateLocalizationData(): LocalizationData {
  // This section can be safely ignored, as it is only logic.
  //#region Localization logic
  // Arrays
  const Abilities: Array<AbilityLocalization> = new Array<AbilityLocalization>();
  const Modifiers: Array<ModifierLocalization> = new Array<ModifierLocalization>();
  const StandardTooltips: Array<StandardLocalization> = new Array<StandardLocalization>();

  // Create object of arrays
  const localization_info: LocalizationData = {
    AbilityArray: Abilities,
    ModifierArray: Modifiers,
    StandardArray: StandardTooltips,
  };
  //#endregion

  // Enter localization data below!

  // Return data to compiler
  return localization_info;
}It doesn't matter what name it has, as long as it has the .ts extension. The tooltips go between the Enter localization data below! comment and the Return data to compiler comment.
INFO
I recommend making it into a snippet for easy creation of this signature for every file created. You can copy it from sample file localizationData.ts for every file that you need it.
Dota Reimagined as examples (Talents, Reimagined Effects)
You can check out Dota Reimagined's github, which I originally developed this project for, to see how it looks in terms of folders and files. Each hero has its own file in the heroes folder, and each item has its own file in the items folder. generic folder has files for things like addon_game_mode.
Also, this uses Reimagined Effects and Talents on hero files, which are also processed into unique KVs that my game specifically has been designed to look for in panorama. You can check out how it exactly works and make your own changes to the compiler to support your unique KVs.