Extracting and Compiling VTEX files
Hello everybody. Recently, I've been looking through the .VTEX files used by most of the sprites and particle effects in-game, but I couldn't find any extensive documentation about it. Therefore, I decided to write this little guide in case anybody else finds it useful.
Extracting from VTEX
- Extracting images from compiled VTEX files (
.VTEX_C) is actually quite simple, but we need those files first. If you haven't already extracted them, you can find them inpak01_dir.vpk, which is located in your dota_ugc\game\dota_imported folder. Use a tool like GCFScape or Source 2 Viewer to open and extract the files that you need.

- Next, go to your dota_ugc\game\bin\win64 directory (the tools aren't present in the win32 directory, for some reason). Type the following:
resourceinfo.exe -i <your vtex_c file> -debug tga -mipThis extracts the various mip maps and stores them as individual TGA images. If everything goes well, you should get something like this:
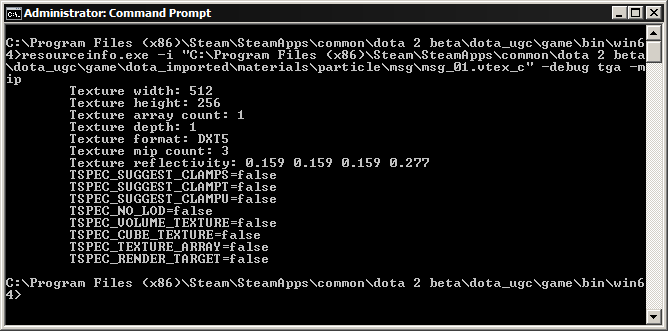
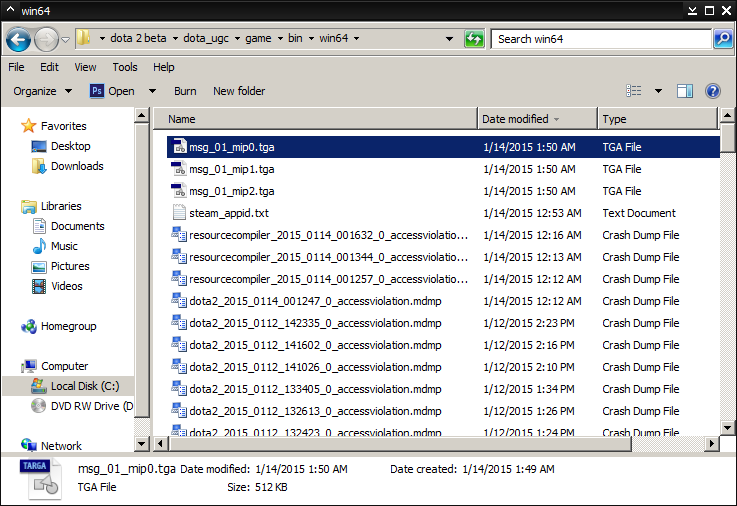
Additionally, you should also have one or more TGA images in your win64 directory, depending on how many mip levels the texture has. Open the one with _mip0, as this is the base (original) image.
- There is no step 3. Congratulations. You have successfully extracted the underlying TGA image from a compiled VTEX file. Easy, right?
Compiling to VTEX
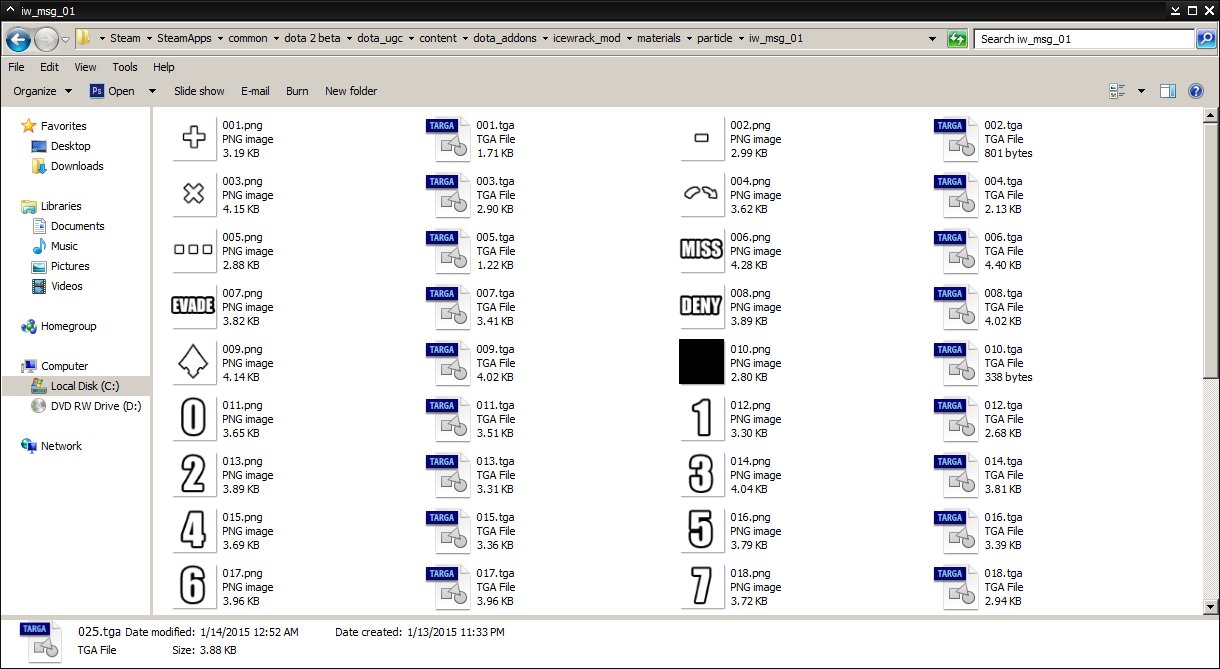
- Compiling to VTEX is also quite easy. First, put all of the TGA images you plan on using in the same directory. If you are only compiling one image, then this is not a problem. For this example though, I will be changing several of the icons in the original msg_01.vtex file.
- Next, we need to create a VTEX file. VTEX files are ASCII data files which describe the properties of the texture, the inputs, and the outputs. If you created your mod from an empty template, you should find some examples of VTEX files in the dota_ugc\content\dota_addons\(modname)\materials\particle directory. Open one of them up and it should look something like this:
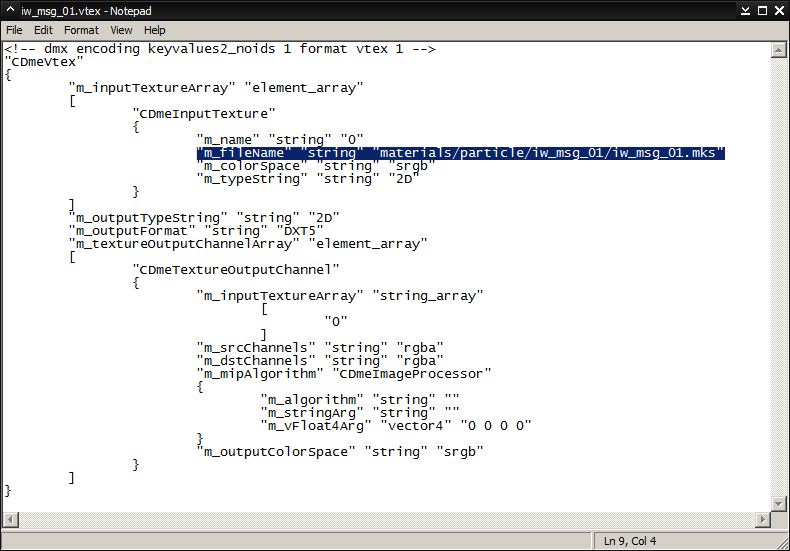
Simply replace the filename in the highlighted line ("m_fileName", under "CDmeInputTexture") with the name of your TGA image and you're set.
2b) If you're creating a texture with sequences however, you must create a .MKS file first. Like VTEX files, .MKS files are ASCII data files, although these files describe how and which sprites to render in-game. Refer to the Valve Developer Wiki for more information on MKS files and animated particles in general. Note that you do NOT need to compile the MKS files with mksheet.exe first.
Once you have the .mks file, replace the filename as mentioned above with the name of the MKS file instead.
- Go back to dota_ugc\game\bin\win64, and type the following:
resourcecompiler -i <your vtex file>If everything goes well, you should see something like this:
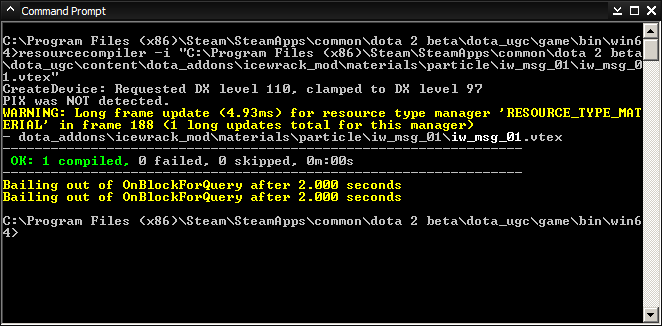
You should also see a .VTEX_C file somewhere in your dota_ugc\game\dota_addons\(modname)\materials folder, which you can now freely use all throughout your mod.
Download
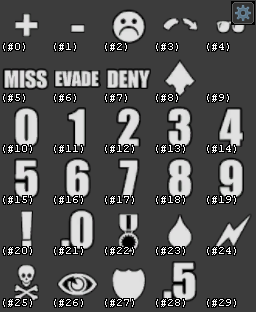
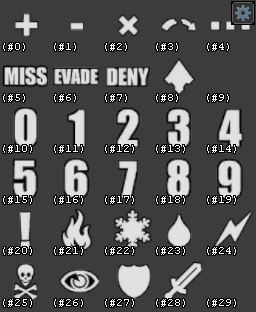
If you want to use the example .VTEX_C file created by this tutorial to use in your mod, you can download it here. For comparison: